Interwar Semis: Where Breathability Actually Matters (And Where It Doesn't)
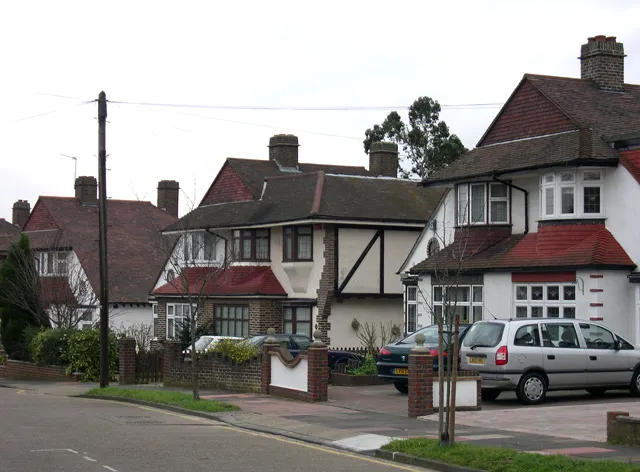
Photo: Roger Kidd, CC BY-SA 2.0, via Wikimedia Commons
The 1930s semi is Britain's default house. Roughly four million of them went up between the wars, most of them brick, most with a cavity, many with a rendered or pebbledashed front elevation, and almost all of them altered at least twice since. If you are reading this with a hammer in one hand, the chances are your walls are a patchwork, and the question is whether a lime or clay plaster will help or hinder.
The honest answer is that it depends entirely on which wall you are talking about. Interwar semis are not one building type so much as a family of them, and the breathability argument lands very differently on a cavity brick gable than it does on a solid-walled bay.
Survey first, specify second
A week of looking is worth a month of arguing about finishes. Start outside, on a dry day, and work round the house methodically.
Tap the render. Hollow, drummy areas tell you where a cement-based coating has lost its key. Look closely at the bottom metre of wall — the plinth, the DPC line, the base of any downpipe. Nine out of ten damp problems in these houses are water management problems, not plaster problems, and no specification survives a leaking gutter.
Then go inside. In a typical 1930s semi you might find original lime plaster on the front room and later gypsum skim over failed backing in the kitchen; timber lath behind a bay; a chimney breast that has been taken out at ground level but not in the loft; and a hallway where forty years of condensation has left a tide mark along the bottom.
Check the cavity. A borescope through a mortar joint will tell you the width — often surprisingly narrow, sometimes 50mm or less, occasionally with rubble or mortar snots bridging it. Look at the wall ties while you are there. Early ties were often iron or fishtail and may be rusted through.
The uncomfortable truth about cavities
Here is the bit that upsets people who have read three blogs about lime: a cavity wall does not need to breathe inwards in the way a solid stone wall does. The cavity is the drying zone. The outer leaf gets wet, the inner leaf stays dry, and water that gets in runs down the ties and out through the weep holes. That is the design, and when it works, it works well.
Breathability becomes urgent when that arrangement breaks down. Three things break it: a dense cement render on the outside face that stops the outer leaf drying; a cavity that has been filled with the wrong material or filled badly; and insulation added internally with no thought for where vapour goes and where cold bridges sit.
Where lime and clay genuinely earn their place
There are plenty of walls on a 1930s semi where the solid-wall logic does apply.
Bays and porches are usually single skin. Dormers and rear extensions from the 1960s and 70s are often single skin or worse. Garden walls, coal sheds, and the piers either side of the front door are solid. Chimney breasts are solid and, since the fire was blocked off, are cold, damp-prone and prone to salt staining.
On all of these, a lime plaster or render lets moisture move to a surface where it can evaporate. Gypsum on a cold solid wall does the opposite: it is mildly hygroscopic but it does not tolerate prolonged damp, and it tends to fail in a soft, friable way that takes the skim with it.
Clay plaster suits the internal solid walls well — it buffers humidity, tolerates intermittent damp better than gypsum, and is easy to patch when you inevitably have to chase in a new socket.
The rendered elevation problem
Many semis have a pebbledash or render front and fair-faced brick sides. The original dash is usually fine, if ugly to some eyes. The trouble tends to be with later repairs: dense cement patches, silicone sealant smeared along cracks, masonry paint applied every decade until the surface is a plastic film.
If you are re-rendering, a lime-based system compatible with the existing substrate is the low-risk route, provided the substrate is sound and the detailing — bellcast, drip beads, sill throats — is done properly. Skipping the detailing to save a day will cost more in five years than the whole render did.
If the render on a cavity wall is sound and doing its job, leaving it alone is a perfectly respectable decision. Breathability is not a moral position.
Internal work: dealing with patchy backgrounds
This is where most of the decision-making actually happens, and where most of the money goes.
Take off loose material. Anything drummy, friable or salt-contaminated comes down to a sound base. Then assess what is left: sound lime backing, sound brickwork, or a cement-based render that has been painted.
A few practical routes:
- Like-for-like repair. Patch with a compatible lime mortar or plaster, feathered into the existing surface, and accept that the wall will look its age. Often the cheapest and best answer.
- Lime plaster over a wood wool or cork carrier. Good where the background is uneven or where you want a small amount of added insulation and a genuinely breathable, vapour-open build-up.
- Clay plaster on wood fibre board. A neat solution for solid internal walls where you want humidity buffering and a warmer-feeling surface without losing much room.
- Gypsum only where it belongs. Dry linings on internal partitions and stud walls are fine. Gypsum directly onto cold, damp-prone masonry is where the trouble starts.
Whatever route you take, avoid dot-and-dab plasterboard on external walls. It creates a cold, ventilated void behind the board where moist air can condense on the masonry, and it hides the problem until the board starts to smell.
Cold bridging and the retrofit question
If you are adding internal insulation to an interwar semi, the junctions matter more than the U-value. Wall-to-floor, wall-to-party-wall, window reveals, and the top of the wall at ceiling level are all places where a cold strip will produce condensation and, eventually, black mould.
Wood fibre insulation with a lime or clay finish is a well-proven combination for these houses because it keeps the wall vapour open while reducing the cold surface. It is also slower and more expensive than a stud wall with rigid boards, so plan the budget before you fall in love with the detail.
And if anyone suggests a full cavity fill on a narrow, rubble-strewn 1930s cavity in an exposed location, get a second opinion first.
Red flags worth walking away from
- Cement render patched over original lime with no movement joint at the floor line.
- Silicone used as a permanent damp cure.
- Salt staining on an internal chimney breast treated with a tanking slurry instead of ventilation and a breathable finish.
- A 'damp-proof' paint on any wall you intend to plaster.
- Plasterboard fixed with dabs on an external wall, with no airtightness or vapour strategy at all.
The 1930s semi is a forgiving house when it is understood and an unforgiving one when it is sealed up. Survey properly, treat water management first, and let lime and clay do the job they are good at on the walls that actually need them.