Boxed In: Sockets, Cables and Pipework in Breathable Walls
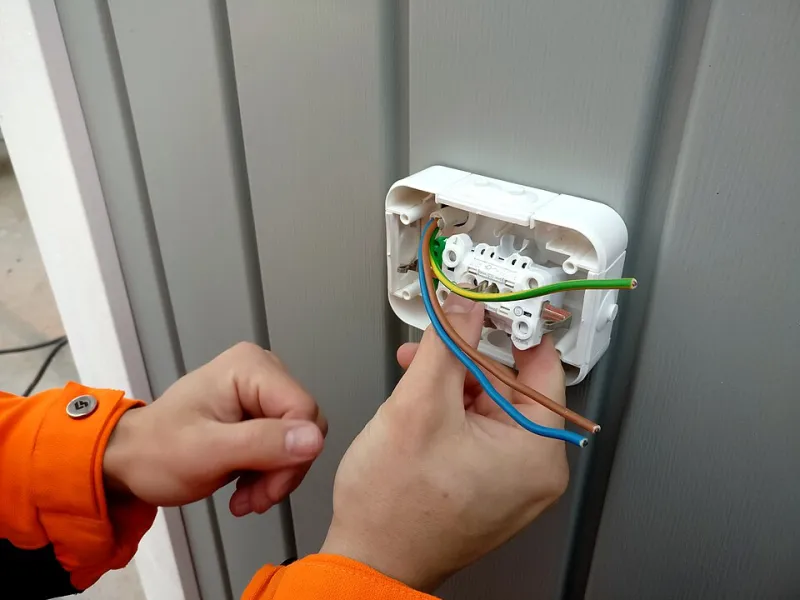
Photo: Santeri Viinamäki, CC BY-SA 4.0, via Wikimedia Commons
Natural plaster walls are not hostile to services. They are just less forgiving of improvisation. A socket is not simply a hole in the plaster; it is a junction where electrical safety, vapour movement, material compatibility and future maintenance all meet. Get that junction right and nobody notices. Get it wrong and you get a cold spot, a crack line, a rusty box or a cable that cannot be replaced without half-demolishing the wall.
In 2026, with more UK homeowners retrofitting old walls and asking harder questions about breathability, the detailing around services deserves the same attention as the plaster itself.
Start with the services, not the plaster
The most reliable way to avoid ugly compromises is to plan the electrics and plumbing before anyone mixes lime or clay. That means finalising socket heights, appliance positions, extract fan routes, radiator pipework and any future-proofing such as data cables or solar inverter connections. On a period property, it also means walking the rooms with the electrician and plumber and asking where they intend to chase, clip and drill.
On historic substrates, deep chasing is often the wrong answer. Brickwork, rubble infill and lath can be damaged by aggressive cutting, and a long horizontal chase can do more structural harm than a few thoughtfully placed surface runs. If flush services are essential, keep routes short, vertical where possible, and away from lintels, beams and slender piers.
What the regs expect
In England and Wales, most electrical work in dwellings falls under Part P of the Building Regulations. Not all of it is notifiable, but the safe approach is to use a registered electrician who can certify the work and confirm compliance with BS 7671. Cables concealed in walls need protection by one of the accepted methods, and they must sit within recognised safe zones or have adequate mechanical protection. RCD protection, earthing and bonding are not optional extras.
Scotland and Northern Ireland have their own building control frameworks, so check locally rather than assuming an England-and-Wales rulebook applies. Listed buildings and conservation areas may also need consent for alterations, including new external penetrations or visible conduit.
For pipework, the key practical points are simple: avoid buried joints, protect against frost, isolate what can be isolated, and pressure-test before the wall is closed up. A pinhole leak behind lime render is a very expensive way to learn that a compression fitting was left inaccessible.
Back boxes: fix them to the wall, not the plaster
A back box should be mechanically fixed to the substrate, not rely on the plaster for support. In lime work, that usually means fixing into brick, block or timber with appropriate screws and plugs, then bringing the lime render or plaster up to the box without making the box part of the plaster's structural life. In clay, the same principle applies: the clay finish should surround the box neatly, not carry it.
Material choice matters. Metal boxes are strong and familiar, but in damp or alkaline lime walls they can be vulnerable if moisture reaches them. Plastic boxes avoid corrosion, though they are vapour-closed in a way that metal is not. In practice, a small back box is rarely the main breathability issue in a wall, but it can become a condensation point if it is cold, poorly sealed or surrounded by impermeable patching. Use the electrician's preferred box type, then detail around it with the wall in mind rather than smothering it in gypsum.
Around the box, avoid a hard, rigid ring of cement-based filler. It is the classic route to a hairline crack at each corner. Lime mortar, clay plaster or a suitable flexible sealant used in conjunction with the wall's movement strategy will usually behave better. Alkali-resistant mesh embedded in the finishing coat can help bridge the transition, but mesh is not a substitute for properly fixed boxes and sensible routes.
Conduit and cable runs
Cables buried directly in lime or clay are difficult to replace and easy to damage during later work. Oval conduit or suitable capping gives some protection and makes rewiring less brutal. Fix the conduit to the substrate, keep it within safe zones, and avoid long diagonal runs that no future electrician will expect. In lime walls, bed the conduit with lime mortar rather than gypsum. In clay walls, use clay-compatible fixing and repair methods so the patch does not become a hard, impermeable island.
Cable derating matters too. A cable run through insulation, behind a service void or in a conduit may not carry the same current as a clipped direct cable. That is an electrician's calculation, not a plasterer's guess, but it is worth raising early because it can change cable sizes and route choices before the first chase is cut.
Pipe clips and pipework
Pipe clips and saddles should be fixed to the substrate, not to the plaster skin. Hot pipes need insulation and room for movement; cold pipes need frost protection and a route that can be drained. Where pipes pass through a wall, keep the penetration neat and seal it in a way that suits the wall's moisture strategy. In an old solid wall, that often means a flexible, vapour-open seal rather than a rigid cement collar. In a retrofit with an internal insulation layer, the airtightness detail may matter more than breathability at that exact point, so agree the principle before someone reaches for the mastic gun.
A site-ready checklist
- Agree socket, switch, cable and pipe routes with the electrician and plumber before plastering starts.
- Confirm whether the wall is being treated as breathable, airtight, or both, and write down the intended build-up.
- Fix back boxes, conduit and pipe clips to the substrate, independent of the plaster finish.
- Keep cable routes in safe zones and use mechanical protection where required.
- Pressure-test pipework and test electrical circuits before the wall is closed.
- Photograph every route with a tape measure in shot for future maintenance.
- Protect box openings and pipe ends during scratch coats and finishing.
- Use lime, clay or compatible repair materials around penetrations, not cement or gypsum patching.
- Mesh transitions where movement is likely, but do not use mesh to hide poor fixing.
- Leave final fix of accessories until decoration is complete, then test and certify.
The humble socket is a good test of a natural plaster job. If it sits tight, the wall around it is sound, the cables can be replaced and the finish has not been compromised, the detail has done its job. If it has been foamed, cemented and hoped for, the wall will eventually tell you.